 Jumpstart Your Garden in January
The early bird gets the worm! Or, in your case, early planning yields fruits for canning! You may not have considered it before, but the time to begin your spring and summer garden is January. Regardless of whether or not your space is already established, If you are considering starting a Garden January/February is a good time to start.
Choosing a Site
The moist winter months can be a time of learning and observation. Consider the lowest and highest points of your land. The most level area is ideal to avoid both water drainage and flooding. Run off not only drains the water, but washes away soil and essential nutrients from your plants. In contrast, flooding occurs where excess water has no place to go and can quickly over saturate your plants.
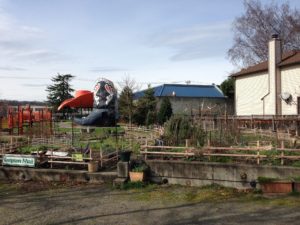
Adequate space for your intended crop as well as plenty of sunlight are also essential considerations for preparation. In order to know how much room you will need, jot down some ideas of what you intend to grow. Then, do some research on how big the plants will get and how much space is needed in between each plant. Don’t forget that if you expect large yields, you’ll need multiple plants of the same variety.
If your area is prone to extreme summers and warmer spring seasons, you’ll want to be wary of planting right in the middle of a wide-open area without any shade during the heat of the day. Ideally, “full sun” loving plants need 4 – 6 hours of direct sunlight. The layout can also provide natural aid to plants prone to sun scorch.
Plant Planning
You’ve picked the prime location. Now, it’s time to think about the following:
- What do you like to grow?
- What will grow well in your area?
- What is your gardening zone?
Take a look at a zoning map to ensure certain plants can withstand your areas coldest temperatures. Try to pick plants that are native or are known for producing well in your area. Then, you’re ready to start plotting the layout. You can grow quite a bit in a small space if you understand how to make your land work for you in the most efficient way. To do this, plant climbing and vining varieties along trellises to keep them from over crowding (or overtaking!) other species. In front of those, bushy varieties like tomatoes or green beans and in front, smaller stalky vegetables like broccoli and lettuce varieties.
Mixing in flowers amongst your vegetables and herbs not only add color and flare, but can serve a purpose. Marigolds are natural rabbit and pest deterrents. Milk weed in a far corner of your yard can attract butterflies keeping them from eating your vegetables. Have fun researching the functionality of different flowers in a vegetable bed! Bear in mind that not all plants make for friendly neighbors. Consult a companion planting guide to keep your plants happy and fruitful.
 Tool Prep
Perhaps the most boring but critical chore in the preparation process is making sure that your tools have been properly maintained. Taking the time to clean your tools will prevent the spread of disease. Like people, plants can be subjected to cross contamination if they come into contact with soil or debris from left over grime on tools. Take the following steps to make sure your tools are ready to work when the sun comes out:
1.Gently but thoroughly wash tools with mild soap and water.
2.Dry tools well to prevent rust.
3.Lightly oil tools with hinges with vegetable oil or some sort of mild,
natural oil.
4.Sharpen any blades for more safe and accurate pruning.
Soil Prep
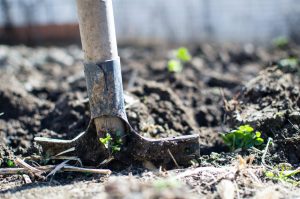
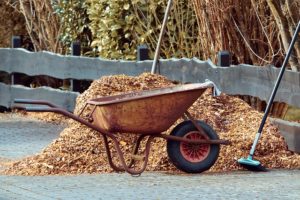
I liken the process of readying soil beds to bringing home a new pet: You want to make sure your new arrival has everything it will need to be comfortable and healthy. Start by pulling any old or dead plants and weeds out. Then, turn the soil! (You can skip the gym on this day… whether you use a shovel or roto tiller, you’ll get your workout in!) Turning the soil aerates it and makes it easier to mix in fertilizers, nematodes and compost. After you’ve fertilized and mixed well, lightly water your soil down. Your dirt is now happy dirt and the earth worms are singing your praises!
If you intend to use raised beds, start with a layer of cardboard on the bottom. Cardboard will take care of any unwelcome grass or weeds and will turn into compost over time. Fill your beds with layers of gardening soil and fertilizer. When your plants settle in, they will be so grateful they’re sure to serve up the biggest and juiciest produce they can for you.
Seed Planting
Now, the fun begins! Contrary to what you’ve been told, you do not have to wait until spring to begin growing seeds. Gardeners use methods for germinating seeds in pots in a window or greenhouse to grow lights in special mossy pods. Germinating seeds need approximately fifteen hours of sun per day and adequate darkness, as well. When they begin to get a bit bigger, transplant them to a slightly larger pot. (Solo cups work great!) Regardless of your preferred method, you can benefit from starting your seeds mid to late January. Starting your own seeds is greatly rewarding and much cheaper than buying established plants at your local grocer or nursery.
Pesticide Considerations
When dealing with insecticides and pesticides, you should really try to avoid anything with chemicals altogether. While they are okay to use on flowers, they can be extremely dangerous if consumed by a human. They are also harmful for the ecosystem that your project has created (whether you intended it to or not!). Well maintained plant beds provide homes to all sorts of critters –small and large. It’s important to understand and monitor different ..eh hm.. “guests” under your veggie leaves. If they are harming your plants, there are natural ways to combat greedy squatters.
Watering in nematodes every few months, releasing lady bugs, and spraying Neem Oil every to every other week will keep most damaging pests at bay. Diatomaceous Earth is a naturally occurring pesticide to get rid of ants, slugs, and other harmful garden foes. It can be mixed in along with your fertilizer and compost to begin working in your soil long before those evil weevils get at your goodies!
In conclusion
If you are planning on Starting a garden January/ February is a good time to get started.
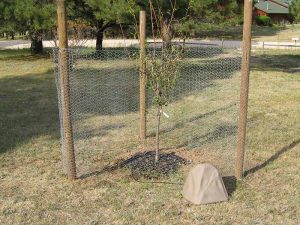
Watering Rocks
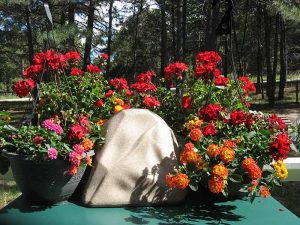
A critical part of garden planning, naturally, is a watering source. Watering rocks are great irrigation tool for several reasons:
• They provide up to five days (or more!) of continuous drip irrigation. This is perfect for when you leave town for a few days and cannot water yourself.
• You can add nutrients and pesticides (like nematodes) into the rock and allow it to slowly release into your soil. This saves time and effort when it comes to mixing and watering and measuring.
• They are pleasurable and fun to look at! They enhance the aesthetic (as if loads of tomatoes on a vine aren’t enough!)
• Watering rocks save water by providing direct drip irrigation where your plants need it the most. No more wetting soil willy-nilly – over watering or not providing enough.
What are you waiting for? Bundle up and get to prepping! By the time April comes around, you will be looking forward to a leisurely day of planting without all the grunt work. Happy Prepping!
